
Hydra: Run your own Identity and Access Management service in <5 Minutes
This article introduces Hydra, the open source micro service alternative to proprietary authorization solutions. It will take you less than five minutes to start up a OAuth2 provider and gain access to a rich features set, including access control and identity management.

Hydra was primarily written in response to our team’s need for a scalable 12factor OAuth2 consumer / provider with enterprise grade authorization and interoperability without a ton of dependencies or crazy features. While we where at it, we added policy, account and client management and some other features. In order to avoid maintaining five different databases, or even paying someone to maintain them, and dealing with unpredictable dependency trees, Hydra only requires Go and PostgreSQL or any other SQL speaking database.
Hydra’s core features in a nutshell:
- Account Management: Sign up, settings, password recovery
- Access Control / Policy Decision Point / Policy Storage Point backed by Ladon.
- Rich set of OAuth2 features:
- Hydra implements OAuth2 as specified at rfc6749 and draft-ietf-oauth-v2-10 using osin and osin-storage
- Hydra uses self-contained Access Tokens as suggested in rfc6794#section-1.4 by issuing JSON Web Tokens as specified at https://tools.ietf.org/html/rfc7519 with RSASSA-PKCS1-v1_5 SHA-256 hashing algorithm.
- Hydra implements OAuth2 Introspection (rfc7662) and OAuth2 Revokation (rfc7009).
- Hydra is able to sign users up and in through OAuth2 providers such Dropbox, LinkedIn, Google, etc.
- Hydra speaks no HTML. We believe that the design decision to keep templates out of Hydra is a core feature. Hydra is a service, a backend, not frontend.
- Easy command line tools like
hydra-host jwtfor generating jwt signing key pairs orhydra-host client create. - Hydra works both with HTTP/2 and TLS and HTTP (Warning: This feature is not yet secure - use only in development).
- Hydra provides many unit and integration tests, making sure that everything is as secure as it gets! We use github.com/ory-am/dockertest for spinning up a postgres, or any other, image on the fly and then running integration tests against them. Give it a try if you want to speed up your integration test development.
Hydra was written by me (GitHub / LinkedIn) as part of a business application which has not been revealed yet. Hydra development is supervised by Thomas Aidan Curran.
What do you mean by Hydra is backend?
Hydra does not offer a sign in, sign up or authorize HTML page. Instead, if such action is required, Hydra redirects the user
to a predefined URL, for example http://sign-up-app.yourservice.com/sign-up or http://sign-in-app.yourservice.com/sign-in.
Additionally, a user can authenticate through another OAuth2 Provider, for example Dropbox or Google.
I want some action, man!
Cool, me too! :) Let’s see how to set up Hydra and get a token for a client app, also known as the OAuth2 Client Grant (read section “Application Access”). If you are not familiar with the console commands, or if you run into issues, please consult our GitHub Issue Tracker.
Please note: Hydra is going to be shipped through a Docker container in the future. For now, you’ll need Vagrant, VirtualBox and Git.
1 2 3 |
git clone https://github.com/ory-am/hydra.git cd hydra vagrant up |
Note: For the rest of this tutorial, I am assuming that you do not change your working directory. I am also assuming,
that you are on a Linux/Unix host and have a decent shell. If you do not, feel free to vagrant ssh into the VM. You will
then be able to run all the commands (e.g. curl) without hassle. Only make sure that stay in the VM by avoiding exit calls.
I am recommending this especially if you are on windows, because it is missing curl and other command line tool quirks.
You should now have a running Hydra instance! Vagrant exposes ports 9000 (HTTPS - Hydra) and 9001 (Postgres) on your localhost.
Open https://localhost:9000/alive to confirm that Hydra is running. You will probably have to add an exception for the
HTTP certificate because it is self-signed, but after that you should see {"status":"alive"} indicating that Hydra is alive and running!
Vagrant sets up a test client app (id: app, secret: secret) with super user rights. To do so,
Vagrant runs hydra-host client create -i app -s secret -r http://localhost:3000/authenticate/callback --as-superuser.
hydra-host offers different capabilities for managing your Hydra instance. Check the docs for additional information. You can also always access hydra-host through vagrant.
1 2 3 4 5 |
vagrant ssh hydra-host help # to exit vagrant shell type exit |
Note: Vagrant sometimes fails to boot due to network issues, if you don’t see the 404 error simply run vagrant destroy -f && vagrant up. After a minute or two delay,
Hydra should be running fine after that.
OAuth2 Token Client grant
Now that Hydra is running, let’s try out some token magic! I’m assuming that you have curl installed on your system. If not, check this page. Our goal is to exchange our client credentials for an access token.
Note: We’re using curl --insecure because the TLS certificate is self-signed. Your output will have different tokens,
but the response should always look the same.
1 2 3 4 5 6 7 |
curl --insecure -X POST --user app:secret "https://localhost:9000/oauth2/token?grant_type=client_credentials"

{
    "access_token": "eyJhbGciOiJSUzI1NiIsInR5cCI6IkpXVCJ9.eyJhdWQiOiIiLCJleHAiOjE0NTAzNTc4MDksImlhdCI6MTQ1MDM1NDIwOSwiaXNzIjoiIiwiamlkIjoiMmYyYjk2MGQtZjE3OC00MzE5LWI4OGEtODc3YzM1Y2U5NTFkIiwibmJmIjoxNDUwMzU0MjA5LCJzdWIiOiJhcHAifQ.cLSY3G0Ngz62hJmanADZ3LUfblB5nOZOWr7bAflE9T0pZBp-Qv1sTkwRCQfqv870cpHdFvN9xL_AReMmNo_o9sLmXfNZDL5WJzDhhsLximxPMD-rO0DjnvY5663l0fvhFMlaGREsHGWDzPN-wZLczRjlFr1JXPv80qMeCm9d343hGMu26WWZ8bfdgAbae8ecmSO_oP7I8U0tWn22FzVJjSRuaShKxlWyQY2K_0-VoHDQDZMTEIXxYGNPA0MmCOEK1DDAiUeKTbguMSLMCjXTkbxd2rMwHday1oHDH8aBkyL0CGmmfVfl20hfRYqJ0x7_0sTd__-inASEjozSvYkVOw",
    "expires_in": 3600,
    "token_type": "Bearer"
} |
Note: It is currently under discussion, whether Hydra should issue only self containing JWT tokens or support other token types as well. Feel free to join the discussion our GitHub Issue Tracker.
OAuth2 Token Password grant
That was quick, right? Let’s create a regular user account! You can use anything you want as the username (email, name, random id) but it must to unique. Please make a note of the allocated ID. We will need it later!
1 2 3 4 5 6 |
> vagrant ssh > hydra-host account create foo@bar.com --password secret Created account as "e152f029-424f-4d4d-9d69-643225113ee5". > exit |
Authenticate the user account through the OAuth2 Password Credentials Workflow.
1 2 3 4 5 6 7 8 |
curl --insecure --data "grant_type=password&username=foo@bar.com&password=secret" --user app:secret "https://localhost:9000/oauth2/token"

{
  "access_token": "eyJhbGciOiJSUzI1NiIsInR5cCI6IkpXVCJ9.eyJhdWQiOiIiLCJleHAiOjE0NTAzNzAwODAsImlhdCI6MTQ1MDM2NjQ4MCwiaXNzIjoiIiwiamlkIjoiYTdjZDFmYWQtZTg5MS00ZDJmLWIwZmEtMzE2Zjg3MTI5ZGIyIiwibmJmIjoxNDUwMzY2NDgwLCJzdWIiOiJiY2U5M2QzMy05YjVhLTQ5MzMtOTQ3Mi1jYWRhMDE4ZGFmNjAifQ.dqUHiAJ0uoUYtV4hqhgVqYqA6PSy1cmNZQruyTpmRaCBh2RHzkijFj4F-T8xTbrFBnysTQG3LxxeXkDNq6PZBsZ4WzvUXSy1R18MayT5FWkgAi-ROQ2lHn9Isw1IgN3XWO-YOaQt9rO0gG4w_hRQ-DprMMKcUkNVC1zK_pdUpaB7cEurYF3sd7krPQjIhucPVhJqDjkAIZGG54kd28_uLqKi3eTaDrViwGLbYzmLenfTb79Hxjfd8qFd_KBQW-f1maLy0BwQNP1pVu2I_P7CBjIwEm898wTPye42CFUfVzyvB6ob4sAZM60YVwzxN_zaw_SO1160HbDI4oO-HwwPig",
  "expires_in": 3600,
  "refresh_token": "eyJhbGciOiJSUzI1NiIsInR5cCI6IkpXVCJ9.eyJpZCI6IjBlNmJmNTBlLTU1N2EtNGJiYy1iZDk1LTg3ZDJkOTNkOGQ5YSJ9.JFVgu7Tf1BZJLrMbgKi0wyBKXZuHB63yKbv6_UP8TUkUgH8e9S5Gi9MhlPOnU0KyiEkh8p5Z0CMN2HQeIeYj-0p3POFxoSkY6NPZeWKsnPXzDjlJJmXWYrqgI-N-BD26MmoGXLjHt_DY3hxBX_EzHHuqVk9q-2pUAfwc0BHjSidF5EZ852I5e3J0WHbiw4KnogNRKNN-lsiIIEBSjkBxyyH85Dx4JdQZsAJVBKiXXzizWIQeQABAIutvIs5ok3T4xD8WYEiSuiHdKbPKe9bjNGX2OqW1X-eDts4RE0eHWatNQ-IafwMvi-7A0f5PSf26pSGPQ5TyvpA5qbnYAIXrMw",
  "token_type": "Bearer"
} |
OAuth2 Authorize Workflow
Now try the OAuth2 Authorize workflow! To do this, use the account ID from above. Because Hydra is only backend, use the following exemplary sign up and sign in endpoints. Take a look at them hydra-signin and hydra-signup to see some very basic example code.
1 2 3 |
vagrant ssh ACCOUNT_ID=<account_id_from_above> hydra-signin & exit |
Replace <…> with your values from above, for example:
1 2 3 |
vagrant ssh ACCOUNT_ID=e152f029-424f-4d4d-9d69-643225113ee5 hydra-signin & exit |
Now, point the web browser to: https://localhost:9000/oauth2/auth?response_type=code&client_id=app&redirect_uri=http://localhost:3000/authenticate/callback&state=foo.
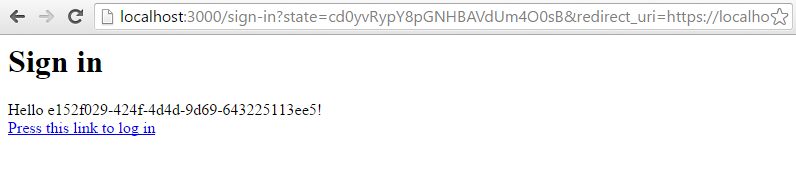
Click the text “Press this link to sign in” to be redirected to another page.

This location of the sign up and sign in locations are defined the environment variables SIGNUP_URL and SIGNUP_URL.
Obviously, these endpoints are just mock ups. There are more details on environment variables in the docs.
For the next step, use the allocated code and call curl again.
1
|
curl --insecure --data "grant_type=authorization_code&code=<code_crom_above>" --user app:secret "https://localhost:9000/oauth2/token" |
Replace <…> with your values from above, for example:
1 2 3 4 5 6 7 |
curl --insecure --data "grant_type=authorization_code&code=fEat4PS3TVeyWrwKgLxICg" --user app:secret "https://localhost:9000/oauth2/token"

{
  "access_token": "eyJhbGciOiJSUzI1NiIsInR5cCI6IkpXVCJ9.eyJhdWQiOiIiLCJleHAiOjE0NTAzNTkwNDMsImlhdCI6MTQ1MDM1NTQ0MywiaXNzIjoiIiwiamlkIjoiZmMzODg4NjktZWE2MC00YzE4LWI1NmMtM2I4YmYzOTJmMzU5IiwibmJmIjoxNDUwMzU1NDQzLCJzdWIiOiJhcHAifQ.foEvIJX3hwuCJCQvIi6x31m3g1VQ0RAp6ouiiVFIs2mVM7GsD2O3aS8WxlKaxZ5P7VhbJpxTR2zg9GDSGRe-Acj26r1OVjY9QSoLIeMNg2VfA6AwpASmYhP8EOdlbyjFEK8hC14JXToWn-cT6UXE0IZxg0ANevzDSHlPnaLDemNBkxoQ1cQPIOxPOz7xZSSDZmw9rv-MNlPi6F-FNZOEig5iEyl5vzDgExr5438Qkmc5OzlLYz-RoOroFtiyoqPXp0aYEms4zaowzB4m_DrQd0cIuAKjrtlUnbvId0rOnx-PBtF6yWZfSC7_hmWwtfrmho-XFWfaawjZswRWTAgaMg",
  "expires_in": 3600,
  "token_type": "Bearer"
} |
Cool, you just accomplished the authorize workflow! Let’s move on to the next topic, policies!
Policies
Policies are something very powerful. Modelled on how AWS handles policies, we adopted the AWS architecture for Hydra. The in depth documentation is at the Ladon GitHub Repository.
1 2 3 4 5 6 7 8 9 10 11 12 13 14 15 16 17 18 19 20 21 22 23 24 25 26 27 28 29 30 |
{
    // This should be a unique ID. The ID database requires this ID for retrieval.
    id: "68819e5a-738b-41ec-b03c-b58a1b19d043",

    // A human readable description. Not required
    description: "something humanly readable",

    // Which identity does this policy affect?
    // As you can see here, you can use regular expressions inside < >.
    subjects: ["max", "peter", "<zac|ken>"],

    // Should the policy allow or deny access?
    effect: "allow",

    // Which resources does this policy affect?
    // Again, put regular expressions inside < >.
    resources: ["urn:something:resource_a", "urn:something:resource_b", "urn:something:foo:<.+>"],

    // Which permissions does this policy affect. Supports RegExp
    // Again, regular expressions inside < >.
    permissions: ["<create|delete>", "get"],

    // Under which conditions this policy is active.
    conditions: [
        // Currently, there is only an exemplary SubjectIsOwner condition available.
        {
            "op": "SubjectIsOwner"
        }
    ]
} |
This is what a policy looks like. As you can see, there are various attributes:
- A Subject could be an account or an client app
- A Resource could be an online article or a file in a cloud drive
- A Permission can also be referred to as “Action” such as “create” something, “delete” something, etc.
- A Condition can be an intelligent assertion (e.g. is the Subject requesting access also the Resource Owner?). Right now, only the SubjectIsOwner Condition is defined. In the future, many more conditions e.g. IPAddressMatches or UserAgentMatches will be added.
- The Effect, which can only be allow or deny (deny always overrides).
Do you remember that the test client app (app) was created with super-user rights and our test user without super-user rights? Let’s see what this means in real life!
Let’s see if the test client app has the rights to do “create” on resource “fileA.png”. First, we need an access token for our client.
1 2 3 4 5 6 7 |
curl --insecure --data "grant_type=client_credentials&username=foo@bar.com&password=secret" --user app:secret "https://localhost:9000/oauth2/token"

{
  "access_token": "eyJhbGciOiJSUzI1NiIsInR5cCI6IkpXVCJ9.eyJhdWQiOiIiLCJleHAiOjE0NTAzNTkwNDMsImlhdCI6MTQ1MDM1NTQ0MywiaXNzIjoiIiwiamlkIjoiZmMzODg4NjktZWE2MC00YzE4LWI1NmMtM2I4YmYzOTJmMzU5IiwibmJmIjoxNDUwMzU1NDQzLCJzdWIiOiJhcHAifQ.foEvIJX3hwuCJCQvIi6x31m3g1VQ0RAp6ouiiVFIs2mVM7GsD2O3aS8WxlKaxZ5P7VhbJpxTR2zg9GDSGRe-Acj26r1OVjY9QSoLIeMNg2VfA6AwpASmYhP8EOdlbyjFEK8hC14JXToWn-cT6UXE0IZxg0ANevzDSHlPnaLDemNBkxoQ1cQPIOxPOz7xZSSDZmw9rv-MNlPi6F-FNZOEig5iEyl5vzDgExr5438Qkmc5OzlLYz-RoOroFtiyoqPXp0aYEms4zaowzB4m_DrQd0cIuAKjrtlUnbvId0rOnx-PBtF6yWZfSC7_hmWwtfrmho-XFWfaawjZswRWTAgaMg",
  "expires_in": 3600,
  "token_type": "Bearer"
} |
Hydra needs the following information to allow an access request:
- Resource: Which resource is affected?
- Permission: Which permission is requested?
- Token: What access token is trying to perform this action?
- Context: The context, for example the user ID.
- Header
Authorization: Bearer <token>with a valid access token, so this endpoint can’t be scanned by malicious anonymous users.
To check if the client app app has the right to create the resource filA.png, use the following curl request, and copy the access token from above into the POST body (–data “…token=…”) and use the clients credentials in the Authorization (–user app:secret):
1 2 3 4 |
curl --insecure \
--data '{"resource": "filA.png", "permission": "create", "token": "<client_token_from_above>"}' \
--user app:secret \
"https://localhost:9000/guard/allowed" |
Replace <…> with your values from above, for example:
1 2 3 4 5 6 |
curl --insecure \
--data '{"resource": "filA.png", "permission": "create", "token": "eyJhbGciOiJSUzI1NiIsInR5cCI6IkpXVCJ9.eyJhdWQiOiIiLCJleHAiOjE0NTAzNjkzOTQsImlhdCI6MTQ1MDM2NTc5NCwiaXNzIjoiIiwiamlkIjoiZWZkM2M2ODMtZTQ3Ny00ODQ4LThmZTYtZWU4NGI1YzAzZTUxIiwibmJmIjoxNDUwMzY1Nzk0LCJzdWIiOiJhcHAifQ.Q4zaiLaQvbVr9Ex3Oe9Htk-zhNsY2mtxXQgtzvnxbIbWcvF2TE_fKoVAgOGQiUiF263CNVCpKqQkMGtWcm_c1fa_2r4HYXZvOoccxHrz7foaSuLDfqcfKinlhLn_UvERT5jR9sYOA5Vw7ES1cq2WdrP17LXog9V40I0aZzmhqHXFdAv5vb4y5MdUKpaJgR_PWLBE_c12nmCRrLceSgHzVAVEyxW0BkUAK4cypIH0cz-lsSPsFZLUogQQi0oBON3FVEuXeNBxJb-Ecp3V3C5aKjrg2bs0OKeJt-ZItrzfsQF4Gsgh2irpLfF4tMN6fNDosulNT5-HuGLJGfzJzT2RYQ"}' \
--user app:secret \
"https://localhost:9000/guard/allowed"

{"allowed": true} |
We could now check if our test user foo@bar.com has the rights to do “create” on resource “fileA.png”. Spoiler alert: he does not because he is not a superuser and we did not define any additional permissions. First, make an access token for the client and then an access token for the user:
1 2 3 4 5 6 7 8 |
curl --insecure --data "grant_type=password&username=foo@bar.com&password=secret" --user app:secret "https://localhost:9000/oauth2/token"

{
  "access_token": "eyJhbGciOiJSUzI1NiIsInR5cCI6IkpXVCJ9.eyJhdWQiOiIiLCJleHAiOjE0NTAzNzAwODAsImlhdCI6MTQ1MDM2NjQ4MCwiaXNzIjoiIiwiamlkIjoiYTdjZDFmYWQtZTg5MS00ZDJmLWIwZmEtMzE2Zjg3MTI5ZGIyIiwibmJmIjoxNDUwMzY2NDgwLCJzdWIiOiJiY2U5M2QzMy05YjVhLTQ5MzMtOTQ3Mi1jYWRhMDE4ZGFmNjAifQ.dqUHiAJ0uoUYtV4hqhgVqYqA6PSy1cmNZQruyTpmRaCBh2RHzkijFj4F-T8xTbrFBnysTQG3LxxeXkDNq6PZBsZ4WzvUXSy1R18MayT5FWkgAi-ROQ2lHn9Isw1IgN3XWO-YOaQt9rO0gG4w_hRQ-DprMMKcUkNVC1zK_pdUpaB7cEurYF3sd7krPQjIhucPVhJqDjkAIZGG54kd28_uLqKi3eTaDrViwGLbYzmLenfTb79Hxjfd8qFd_KBQW-f1maLy0BwQNP1pVu2I_P7CBjIwEm898wTPye42CFUfVzyvB6ob4sAZM60YVwzxN_zaw_SO1160HbDI4oO-HwwPig",
  "expires_in": 3600,
  "refresh_token": "eyJhbGciOiJSUzI1NiIsInR5cCI6IkpXVCJ9.eyJpZCI6IjBlNmJmNTBlLTU1N2EtNGJiYy1iZDk1LTg3ZDJkOTNkOGQ5YSJ9.JFVgu7Tf1BZJLrMbgKi0wyBKXZuHB63yKbv6_UP8TUkUgH8e9S5Gi9MhlPOnU0KyiEkh8p5Z0CMN2HQeIeYj-0p3POFxoSkY6NPZeWKsnPXzDjlJJmXWYrqgI-N-BD26MmoGXLjHt_DY3hxBX_EzHHuqVk9q-2pUAfwc0BHjSidF5EZ852I5e3J0WHbiw4KnogNRKNN-lsiIIEBSjkBxyyH85Dx4JdQZsAJVBKiXXzizWIQeQABAIutvIs5ok3T4xD8WYEiSuiHdKbPKe9bjNGX2OqW1X-eDts4RE0eHWatNQ-IafwMvi-7A0f5PSf26pSGPQ5TyvpA5qbnYAIXrMw",
  "token_type": "Bearer"
} |
The command you need to execute looks very similar to the one above, but this time, we’re going to pass the user access token with the JSON body:
1 2 3 4 |
curl --insecure \
--data '{"resource": "filA.png", "permission": "create", "token": "<ACCOUNT_token_from_above>"}' \
--user app:secret \
"https://localhost:9000/guard/allowed" |
1 2 3 4 5 6 |
curl --insecure \
--data '{"resource": "filA.png", "permission": "create", "token": "eyJhbGciOiJSUzI1NiIsInR5cCI6IkpXVCJ9.eyJhdWQiOiIiLCJleHAiOjE0NTAzNzAwODAsImlhdCI6MTQ1MDM2NjQ4MCwiaXNzIjoiIiwiamlkIjoiYTdjZDFmYWQtZTg5MS00ZDJmLWIwZmEtMzE2Zjg3MTI5ZGIyIiwibmJmIjoxNDUwMzY2NDgwLCJzdWIiOiJiY2U5M2QzMy05YjVhLTQ5MzMtOTQ3Mi1jYWRhMDE4ZGFmNjAifQ.dqUHiAJ0uoUYtV4hqhgVqYqA6PSy1cmNZQruyTpmRaCBh2RHzkijFj4F-T8xTbrFBnysTQG3LxxeXkDNq6PZBsZ4WzvUXSy1R18MayT5FWkgAi-ROQ2lHn9Isw1IgN3XWO-YOaQt9rO0gG4w_hRQ-DprMMKcUkNVC1zK_pdUpaB7cEurYF3sd7krPQjIhucPVhJqDjkAIZGG54kd28_uLqKi3eTaDrViwGLbYzmLenfTb79Hxjfd8qFd_KBQW-f1maLy0BwQNP1pVu2I_P7CBjIwEm898wTPye42CFUfVzyvB6ob4sAZM60YVwzxN_zaw_SO1160HbDI4oO-HwwPig"}' \
--user app:secret \
"https://localhost:9000/guard/allowed"

{"allowed": false} |
Wow! That was a lot of copy pasting, but you made it! You have used the primary features of Hydra. Obviously, this introduction only scratches the surface and Hydra has many more things to explore! The team at Ory hopes that you enjoyed this tutorial and that you’re will give Hydra a try. Hydra is not stable yet and we’re working hard to make it stable. If you encounter bugs, feel free to contact us on GitHub!
I would like to thank pathfinderlinden for providing the original logo image as cc-by.