Create a Slack bot with golang
Create a Slack bot with golang
Introduction
In this post we’ll look at how to set up a quick Slack bot that receives messages (either direct or from channel) and replies to the user. I’ve been an IRC user for many years and always loved setting up bots, whether for sports scores, weather, or something else entirely. Recently I’ve actually had an opportunity to implement my first Slack bot and figured I would document the process for others! You can find all of the code for this post listed here, and PRs are certainly welcome :D
For this assignment we’ll need a few things, not all of which are covered in this post. I invite the reader to take a look at the installation practices for the other software dependencies based on their specific environment needs. Here I’ll be using Fedora 26 (4.14.6-200.fc26.x86_64) along with these tools:
- ngrok for Slack API replies – https://ngrok.com/docs#expose
- NHL statsapi to collect hockey scores – https://statsapi.web.nhl.com/api/v1/schedule
- the excellent golang slack library from nlopes – https://github.com/nlopes/slack
You’ll either need to set up an ngrok listener for your chosen localhost port, or develop on a server
that it externally routable (e.g. DigitalOcean droplet). In my case here I’m developing on my laptop but
would deploy permanently on a droplet.
The Slack API
Initial Configuration
The Slack API is well flushed out and spells out what specific
payloads to anticipate for any particular object. There are a number of calls you can develop
your bot to address, but in our case here we’ll look at using the Real Time Messaging API
(RTM) and specifically the chat.postMessage and chat.postEphemeral
methods.
Before any of our code is working we’ll need to set up an app within slack itself. Navigate to the
app registration tool to create a new application within your
workspace. Here I’ve created the NHL Scores app within my workspace.

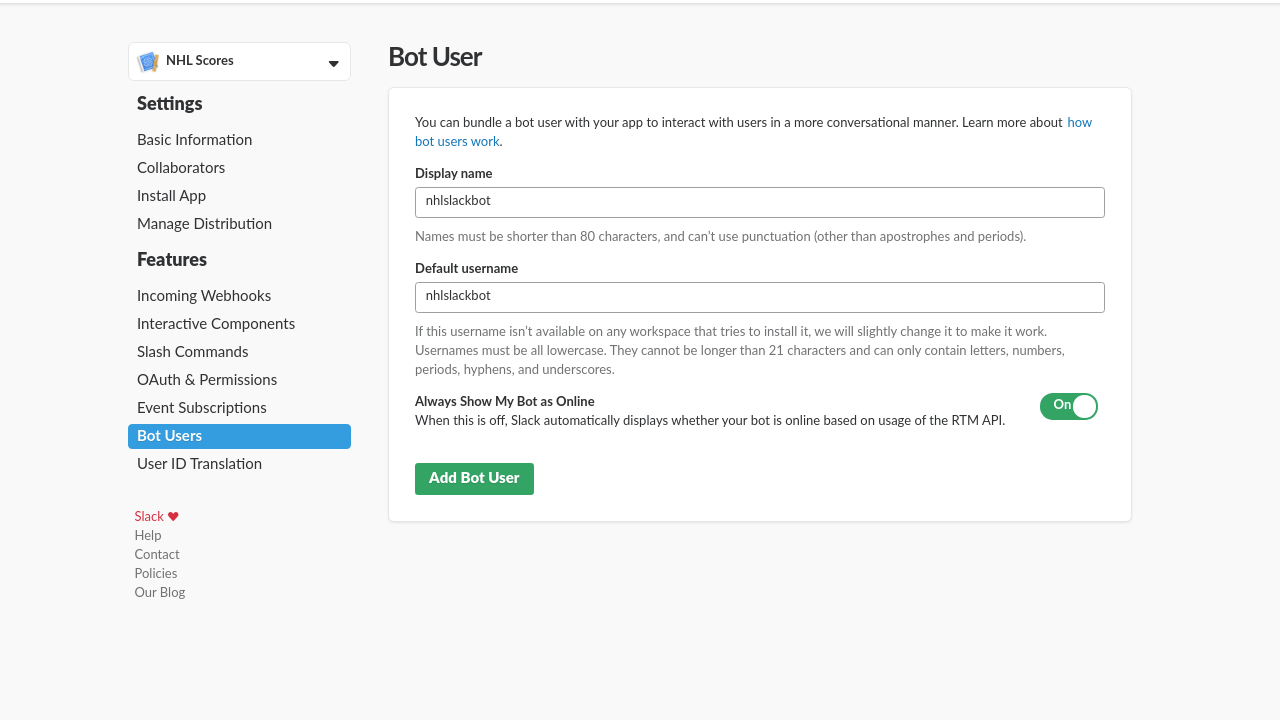
Once done you’ll be presented with a number of options for your new application. Here we’ll need to create
a Bot User that will act as our listener within the workspace. My example is called nhlslackbot and
will be visible to all users within the workspace once mounted.

We’ll need to generate an OAuth token for our user in order to actually connect with the Slack API. To do so
click on the OAuth & Permissions section to Install App to Workspace which will prompt you to authorize
access and generate the tokens you’ll use. You’ll need to copy the Bot User OAuth Access Token somewhere local,
but always make sure this is not shared anywhere! This token is secret and should be treated like your
password!

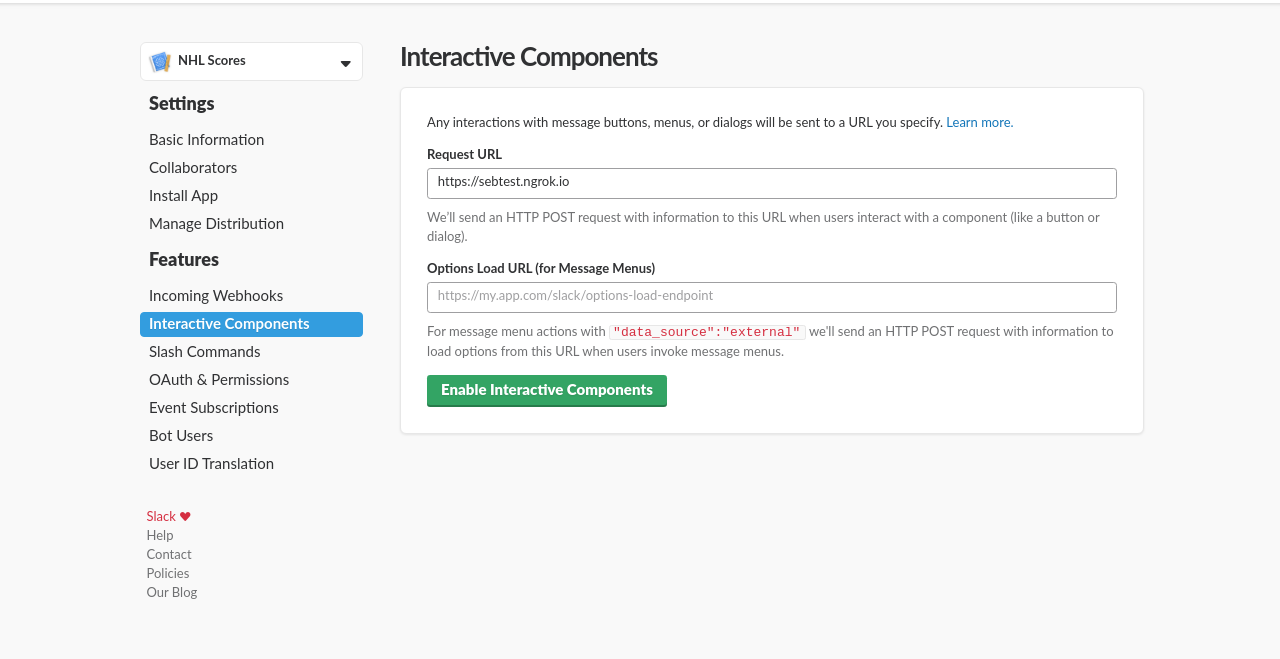
Lastly we’ll need to set up the Interative Components of our application and specify the ngrok (or other)
endpoint that the API will send responses to. In my case, I’ve added a custom ngrok value here called
https://sebtest.ngrok.io/. This endpoint is where we’ll receive all correspondence from Slack itself, and this is how
we’ll be able to process any incoming messages from the channels.

With that all sorted, we can finally dig into the code!
Code components
The crux of the code is how we handle receiving messages from the slack connection. Using the Bot User OAuth
Access Token to establish the initial connection, we must continuously poll the system for incoming messages.
The API gives us the ability to trigger off of a number of event types, such as:
- Hello Events
- Connected Events
- Presence Change Events
- Message Events
- and many more
The beauty of this verbosity is that we can trigger messages on a number of different use-cases, really
giving us the ability to tailor the bot to our specific needs. For this example, we’ll look at using the
*slack.MessageEvent type to support both indirect (within channel using @) or direct messages. From the
library, The primary poll for message events leverages the websocket handler and just loops over events
until we’ve received one that we want:
|
|
Once we confirm that the message is indeed directed to us, we pass the event handler along to our askIntent
function. Remember that this is a contrived example that’s just going to send back NHL game scores to the
user, iff they acknowledge that specific intent. We could build up an entire workflow around this user
interaction that would send different paths depending on user choices to our prompts, or have no prompts
at all! Those different cases are outside the scope of this introductory post, so for now we just want to
send back a quick Yes v No prompt and handle accordingly.
To do precisely that, our handler askIntent will process the message and genreate an chat.postEphemeral
message to send back to the event user (aka the person asking for details). The “ephemeral” post is one that’s
directed only to the requester. Though other users will see the initial request to the bot if within the
same channel, the subsequent interaction with the bot will only be done between the user and the bot. From
the docs:
This method posts an ephemeral message, which is visible only to the assigned user in a specific public channel, private channel, or private conversation.
With that in mind, we set up the initial response payload using the attachments spec from the API, defining a set of actions that the user is able to choose. For this
part of the conversation the user must reply Yes or No for whether they’d like us to retrieve the most
recent scores. If No, we reply with a basic note and continue listening; if Yes then let’s retrieve the
scores!
|
|
The attachments in the snippet above present the user with the following dialog:

If the user selects No, thanks! then we reply with a basic message:

This part of the interaction is precisely where the ngrok endpoint comes into play. The user’s interaction
is not directly with our code, but instead with slack itself. The message and interaction is passed through
slack and on to us at the redirect URL we specified earlier, in my case https://sebtest.ngrok.io which
routes to our internal localhost:9191 interface, and from there to our postHandler as defined in our
webapp router.
The tricky part here is to process the payload portion of the JSON response from the API. The POST that
slack returns back to our URL is a payload form that contains a bevy of information for our interaction. In
this case, the user’s response (either Yes or No) as well as a callbackID which we actually passed
in our original mesage prompt to the user! This is incredibly useful, especially as you have more and more
users interacting with your bot as you can specify unique actions based on the trigger. For example,
if the user selects Yes we could send subsequent ephemeral messages to ask for a specific date, or maybe
a certain team? We could even define the callback value as a key to a function map that would then trigger
some kind of other workflow altogether (like posting to a blog resource, or checking DB credentials, etc). The
options are indeed endless, but for the scope of this contrived example we just stick
to the scores from last night.
|
|
A key component to note here is the http response code; if you do not specify the http.StatusOK value
in your prompt back to the API, the error message you may want to convey to the user gets eaten by the system.
The default slackbot will absorb that message and reply to you (with an ephemeral message no less) with the
status code, but not the messages. Long story short, whatever message you’d like to actually send back to
the requester should have an http.StatusOK header.
Lastly, if our user has selected the Yes option we call out to our NHL stats api and process the results
for the user!
|
|
Sample output below…

Congratulations, you’ve now delivered an ephemeral payload to your slack user’s request!
About The Author
Sebastian Borza is a golang, C, and python developer based in Chicago, IL.
| Source | Handle |
|---|---|
| freenode | sborza |
| efnet | sebito91 |
| github | sebito91 |
| @sebito91 | |
| keybase | sborza |
| GPG | E4110D3E |
